Templates
Design the labels and documents your warehouse prints — barcode labels, LPN labels, location markers, and invoices — and control how they look.
Before you begin
You need template management access, which comes with an administrator or manager role.
Have your label dimensions to hand (4x6" thermal, for example) and know which printer the labels are going to.
The editor needs a connection
Unlike the rest of the platform, the template editor is never cached for offline use — it always loads fresh from the network. This stops a stale copy of the canvas engine causing rendering faults, and it means template editing doesn't work offline.
What you can design
| Kind | What it's for |
|---|---|
| Label | Physical labels printed to a thermal or desktop printer |
| Document | Full-page documents such as invoices |
| Report | Data-driven reports rendered from a query |
Each template also carries a category that groups it in the browser: Inventory, Orders, Receiving, Shipping, Products, Locations, or Custom.
Output formats
| Format | Use it for |
|---|---|
| Documents, reports, and labels on a standard printer | |
| PNG | Previews and images |
| SVG | Vector output |
| ZPL | Zebra Programming Language, for thermal label printers |
Common sizes
| Design | Usual sizes | Used for |
|---|---|---|
| Product labels | 2x1", 3x1" | Identifying individual products |
| LPN labels | 4x6", 4x4" | Pallets and cases |
| Shipping labels | 4x6" | Carrier labels with tracking |
| Location labels | 2x1", 3x2" | Marking warehouse locations |
| Invoices | 8.5x11" | Customer invoices — see invoice rendering |
| Reports | 8.5x11" | Operational reports |
| Custom | Any size | Anything else |
Where templates actually get used
Designing a template doesn't, on its own, make the platform use it. Only two things pick up a template automatically:
- Invoices — invoice PDF generation looks up an active invoice template by name and renders through it. See invoice rendering.
- Reports — system report designs go through the same engine.
Everything else is printed on demand: you open a template and print it, optionally across a range of identifiers.
Pick lists and packing slips are not template-driven
You can design a pick list or packing slip template and print it by hand, but the picking and packing workflows do not render their output through your template. Changing a "Packing Slip" template won't change what those workflows produce.
If you need a template-driven document for those workflows, treat it as a feature request, not a configuration task.
Browsing templates
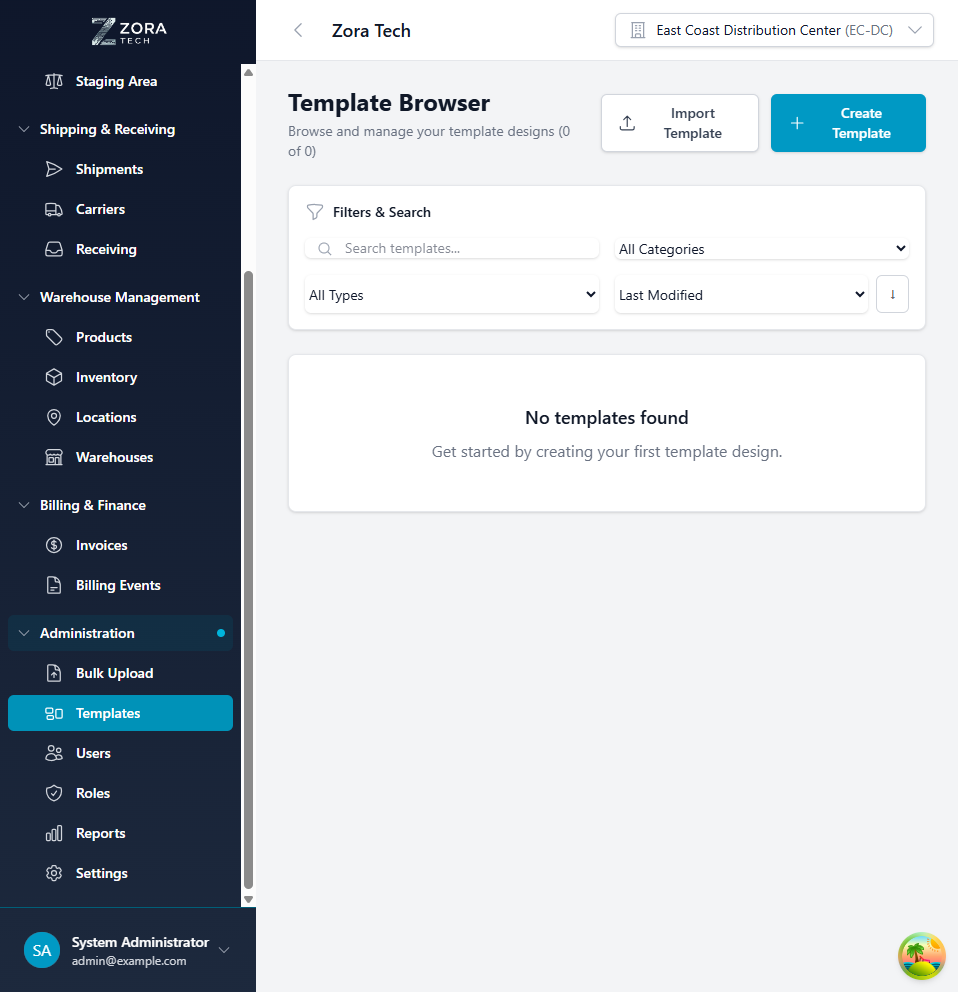
Open Administration → Templates.
From the browser you can search by name or description, filter by type, size, or status, see a thumbnail of each design, and edit, duplicate, delete, or print a test label.
Invoice rendering
Invoices are the main document workflow that picks up a template on its own.
How an invoice finds its template
Invoice generation looks for an active template whose name identifies it as an invoice template. If there isn't one, the platform tells you to create one rather than quietly producing an unstyled document.
Keep exactly one active invoice template
The lookup matches by name, so several similarly named active templates make it ambiguous which one gets used. Keep one active and deactivate the rest.
Bill To addresses
Invoice templates can render a Bill To block, which matters for third-party billing where whoever pays isn't whoever receives the goods.
| Field | Contents |
|---|---|
billTo.companyName | The billed company name |
billTo.addressLine1 | First populated address line |
billTo.addressLine2 | Second populated address line |
billTo.addressLine3 | Third populated address line |
billTo.addressLine4 | Fourth populated address line |
Address lines are compacted — empty parts are dropped rather than left as blank lines, so an address without a second street line doesn't print a gap. Lay the block out as four consecutive lines and let it collapse on its own.
Invoices use a snapshot of the address
An invoice records the customer's company name and billing address as they were when it was raised. Editing the customer record later doesn't change an existing invoice — which is the right behavior for a financial document. Invoices raised before snapshotting fall back to the current customer record.
Long invoices and multi-page output
Invoice templates are document templates, and documents get a table-flow pass that labels don't. The top-most table on the design drives it:
- Rows size to their content. The row height you set is a minimum — a row grows to fit the wrapped text in its tallest cell.
- Page one fills to the bottom page margin, not to the bottom of the table box you drew. Your box is the floor, never the ceiling.
- Continuation pages start at the top margin, redraw the table header, and carry on with the rows.
You don't need a separate page layout for long invoices. Design one table and let it flow.
A cell whose text would wrap past a whole page is cut at the last line that fits and marked with an ellipsis, so one runaway description can't push the rest of the invoice off the page.
Row limits don't apply to invoices
A table element can carry a maximum row count, but a document template ignores it and draws every row — a cap on an invoice would silently drop billable lines. Labels still honor the cap. If an invoice prints more rows than the limit you set, that's why.
Totals and notes below the table
Elements placed below the table box — the subtotal, tax and total block, payment terms, notes — move with the table rather than being painted over it:
- If the table fits its box, they print exactly where you designed them.
- Once the table overruns its box, they keep the gap you designed below it, so they follow the table's real last row. That also pulls them up under a short tail on a continuation page.
- If the block would then cross the bottom margin, it moves to a fresh page.
Elements that overlap the table box vertically, such as background panels and side notes, render where you designed them and are never shifted.
Footer artwork moves with the totals
Page furniture designed in the bottom margin — a footer rule, a "thank you" line — sits below the table, so it travels with the totals block instead of repeating on every page. Keep per-page furniture out of a design that can run long.
Font sizing in tables
Table text is scaled down automatically when the configured font size is large, so a header size that suits a label doesn't blow out a document table. If table text prints smaller than the size you set, that's why — set a smaller size explicitly rather than fighting the scaling.
Attachments
Files attached to an invoice — BOLs, receipts, photos — are stored and listed against it. They're attachments to the invoice record, not content merged into the rendered PDF by your template.
The template editor
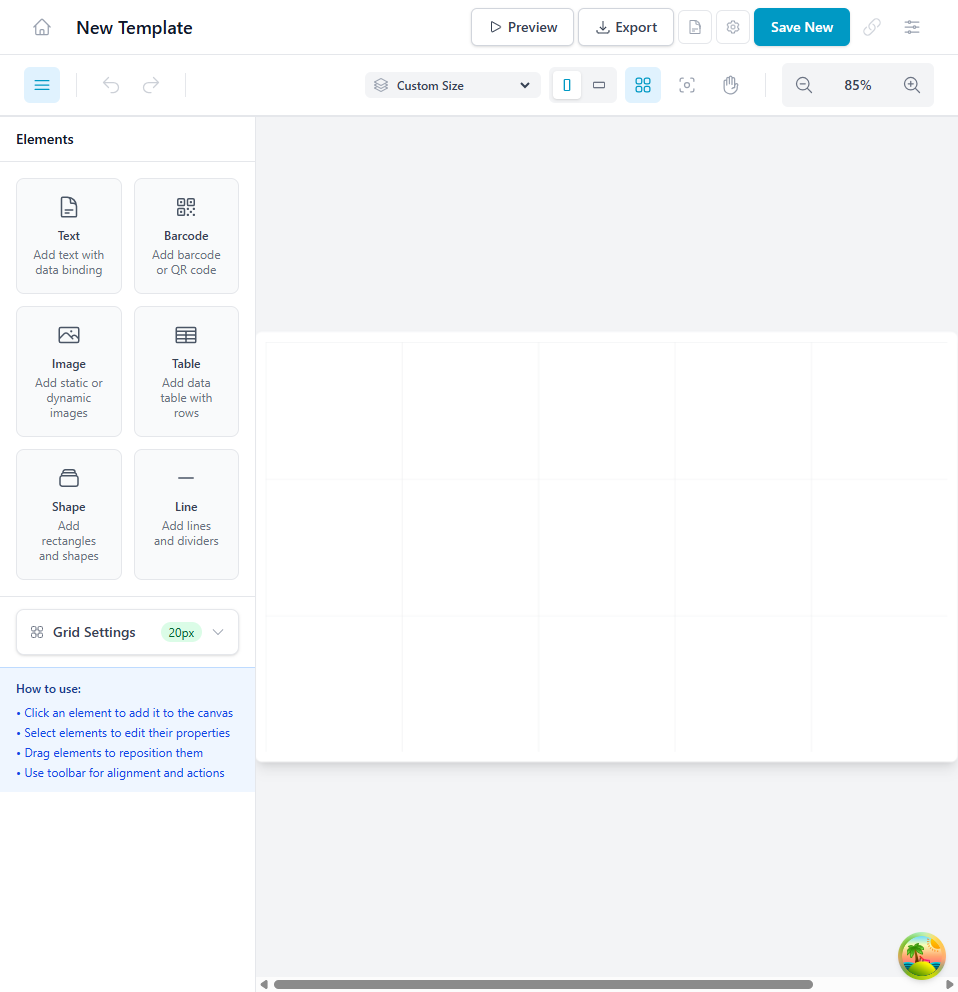
The canvas in the middle is your label or document. The panel on the left holds the elements you can add; the panel on the right shows the properties of whatever you've selected.
Moving around the canvas
| Action | How |
|---|---|
| Zoom | Ctrl + Scroll |
| Pan | Space + Drag, or click and drag |
| Toggle the grid | Ctrl + G |
| Toggle rulers | Ctrl + R |
Turn on the grid and snapping when you want elements to line up, and use the rulers (inches or millimeters) when a measurement has to be exact.
Elements you can add
| Element | Use it for |
|---|---|
| Text | Fixed wording, or a value pulled from a record |
| Barcode | Code 128, Code 39, UPC-A, EAN-13 |
| QR code | URLs or longer data |
| Image | Logos and graphics |
| Line | Dividers between sections |
| Rectangle | Borders and highlight boxes |
| Circle | Badges and markers |
To add one, click the element type, then click the canvas where you want it — or drag it into position.
Setting properties
Every element has a position (X and Y), a size, a rotation, a layer order, and an opacity.
Text elements also take a font, size, style, alignment, and color, plus a data binding if the text comes from a record.
Barcode elements take a type, a data source, a height, and whether to print the human-readable text underneath.
Building a label
- Choose New Template, set the type to Label, pick the size, and give it a name and description.
- Add a Text element near the top for your company name. Around 18pt, bold, centered works well.
- Add a Barcode element in the middle. Choose Code 128, bind it to
{{product.sku}}or{{lpn.number}}, set the height to about 1 inch, and turn on the human-readable text. - Add a Text element below the barcode bound to
{{product.name}}, around 14pt. - Add whatever else the label needs —
{{quantity}},{{location.name}},{{current_date}}. -
Choose Save.
The template appears in the browser and is ready to print.
Print one before you print a thousand
Print a test label on the actual printer and the actual stock, then scan it with the actual scanner. A barcode that looks fine on screen can still fail on 203 DPI thermal stock.
Building a document
Lay a document out in four bands:
| Band | Typical depth | Contents |
|---|---|---|
| Header | Top 2" | Logo, company details, document title |
| Order information | Next 1.5" | {{order.number}}, {{customer.name}}, {{customer.shipping_address}}, {{order.created_at}} |
| Items table | Main body | Column headers and repeating rows — {{item.sku}}, {{item.name}}, {{item.quantity}} |
| Footer | Bottom 1" | {{total_items}}, {{order.notes}}, signature line |
Pulling data onto a template
Wrap a field name in double curly braces and the platform substitutes the real value when the template is printed.
Products
{{product.sku}} · {{product.name}} · {{product.barcode}} · {{product.category}} · {{product.description}}
LPNs
{{lpn.number}} · {{lpn.type}} · {{lpn.contents}} · {{lpn.location}}
Orders
{{order.number}} · {{order.customer_name}} · {{order.created_at}} · {{order.total_items}} · {{order.notes}}
Locations
{{location.name}} · {{location.zone}} · {{location.aisle}} · {{location.type}}
System
{{current_date}} · {{current_time}} · {{warehouse.name}} · {{user.name}}
Formatting a field
Add a filter after a pipe to change how the value prints:
| Written as | Prints |
|---|---|
{{order.created_at \| date: 'MM/DD/YYYY'}} | 11/18/2025 |
{{current_date \| date: 'YYYY-MM-DD'}} | 2025-11-18 |
{{product.price \| currency}} | $15.50 |
{{quantity \| number: 2}} | 100.00 |
{{product.name \| uppercase}} | PREMIUM WIDGET |
{{customer.name \| titlecase}} | John Smith |
Managing templates
To edit one, open it from the browser, make your changes, and save. Each save keeps the previous version in the template's history, so you can look back or restore an earlier one.
To make a variation, choose Duplicate. You get a copy with " (Copy)" on the end to edit freely.
To remove one, choose Delete and confirm.
You can't delete a template that's in use
A template assigned to products or operations has to be reassigned first. Deleting is not something you can undo from the browser.
Printing
Checking it first
Open the template, choose Preview, and either enter sample data or pick a real record. You'll see exactly what will come out of the printer.
Printing a batch
- Go to Products, LPNs, or Orders.
- Tick the records you want labels for.
- Choose Print Labels.
-
Pick the template.
One label is generated per record and sent to the printer.
Designing labels that actually scan
Keep the design sparse. A label with fifteen elements on it is harder to read at arm's length than one with five.
Give the barcode room. At least 0.75 inches tall, with 0.25 inches of clear white space either side. Black on white — nothing else scans reliably.
Print horizontal barcodes. They read more reliably than vertical ones.
Don't go below 10pt on text anyone has to read standing up, and leave a 0.125 inch margin around the edge of the label.
Name templates so you can find them later. "4x6 LPN Label - Warehouse A" beats "Label 3".
Troubleshooting
| Problem | What to check |
|---|---|
| Nothing prints, or the label comes out blank | The printer is connected, has labels loaded, and supports the size. Check the print queue for a stuck job. |
| The barcode prints but won't scan | Height at least 0.75", clear space either side, black on white, and the data source has a value. Try a different scanner to rule it out. |
A field prints as {{field.name}} | Check the spelling and the double curly braces, and that the record you're printing actually has that value. |
| The print doesn't match the preview | The printer's DPI and label size need to match the template. Calibrate the printer if it's consistently off by the same amount. |
| Elements overlap | Turn on the grid and snapping, then check the layer order in the properties panel. |
Related guides
- Bulk upload - Import the data that fills template fields
- Managing receiving orders - Printing LPN labels during receiving
- Shipping and logistics - Printing shipping labels
Need more help? Email support@zoratech.io, or check the FAQ and troubleshooting guide.