Order processing
Take a customer order from the moment it arrives to the moment it leaves the dock: create it, reserve the stock, pick it, pack it, and ship it.
Before you begin
You need access to the Orders page. Allocating stock and cancelling orders may need extra permissions — ask your administrator if a button is missing.
Opening the orders page
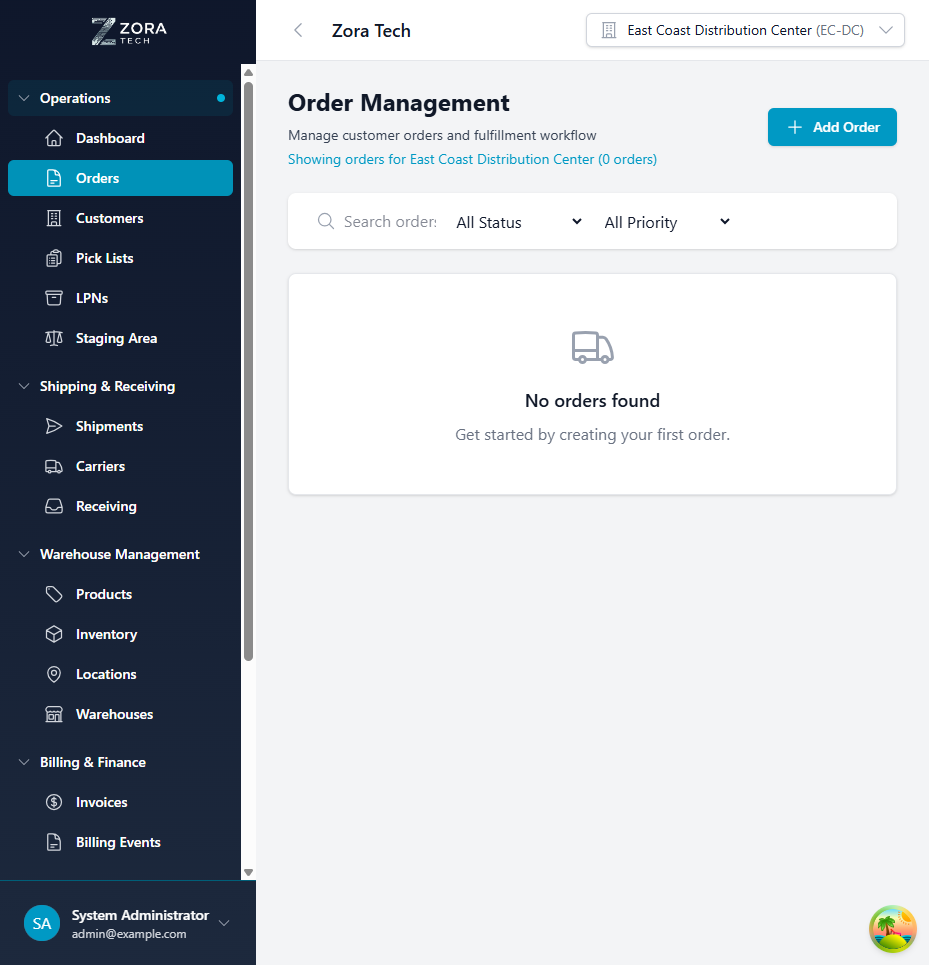
In the sidebar, open Order Fulfillment → Orders.
The page lists every order in the warehouse you are working in. From here you can search, filter, and open any order, or choose Add Order to create one.
Finding an order
| Tool | What it does |
|---|---|
| Search | Finds orders by order number, customer name, or email |
| Status filter | Narrows to Pending, Allocated, Picking, Ready to pack, Dispatched, and so on |
| Priority filter | Narrows to Low, Normal, High, or Urgent |
| Column headers | Click to sort by order, customer, or status |
The list only ever shows the warehouse you have selected in the header. If an order seems to be missing, check that you are in the right warehouse.
What each row shows
| Column | Contents |
|---|---|
| Order Number | The order's identifier, such as ORD-20251118-001 |
| Order Date | When the order was created |
| Customer | Customer name and contact email |
| Qty & Total | How many items, and what the order is worth |
| Status | A color-coded badge for where the order has got to |
| Priority | Low, Normal, High, or Urgent |
Creating an order
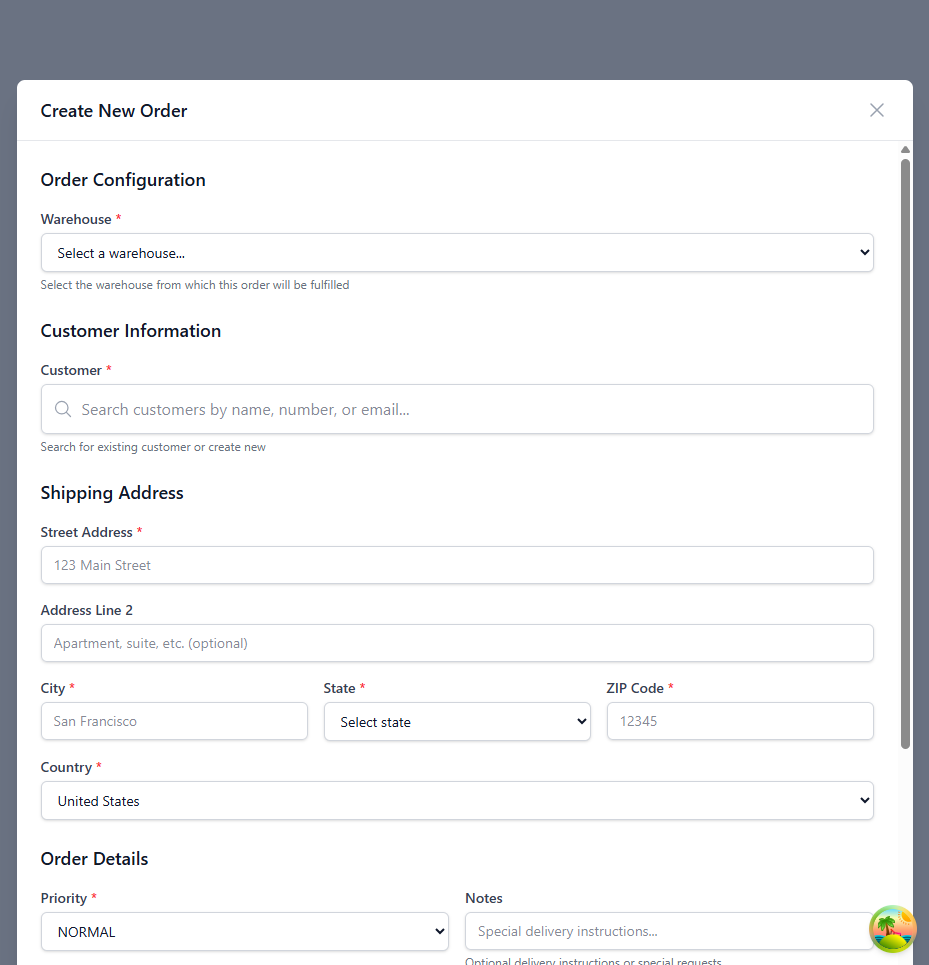
On the Orders page, choose Add Order.
1. Choose the warehouse
Pick the warehouse that will fill the order. This decides which stock can be reserved and which locations and staging areas are available.
2. Choose the customer
Search by customer name, number, or email, then select the customer. If they are not on the list yet, create them first. The form shows their tier, status, and available credit.
3. Choose the shipping address
Pick one of the customer's saved addresses. Delivery instructions and contact details come across with it. You can add a new address here if you need to.
4. Set the priority and notes
| Priority | Means |
|---|---|
LOW | Standard processing |
NORMAL | The default |
HIGH | Move it up the queue |
URGENT | Deal with it now |
Keep URGENT for orders that really are urgent — if everything is urgent, nothing is.
Notes is optional. Use it for delivery instructions, handling requirements, or anything the picker and the driver need to know.
5. Add the products
Search for each product by name, SKU, or barcode, then set the quantity. The platform checks the quantity against the stock you actually have.
Two fields are optional:
- Unit Price — overrides the price from the product catalog, for special pricing.
- Lot Number — restricts the order to one lot. Use it when a customer asks for a specific production batch. Stock is then only reserved from that lot.
6. Create it
Check what you have entered, make sure there is at least one product on the order, then choose Create Order.
The platform checks the required fields and the available stock, creates the order with the status Pending, and returns you to the order list.
Importing orders instead
For large volumes, upload orders from a spreadsheet rather than typing them. See Bulk upload for the file formats and the templates.
Reading an order
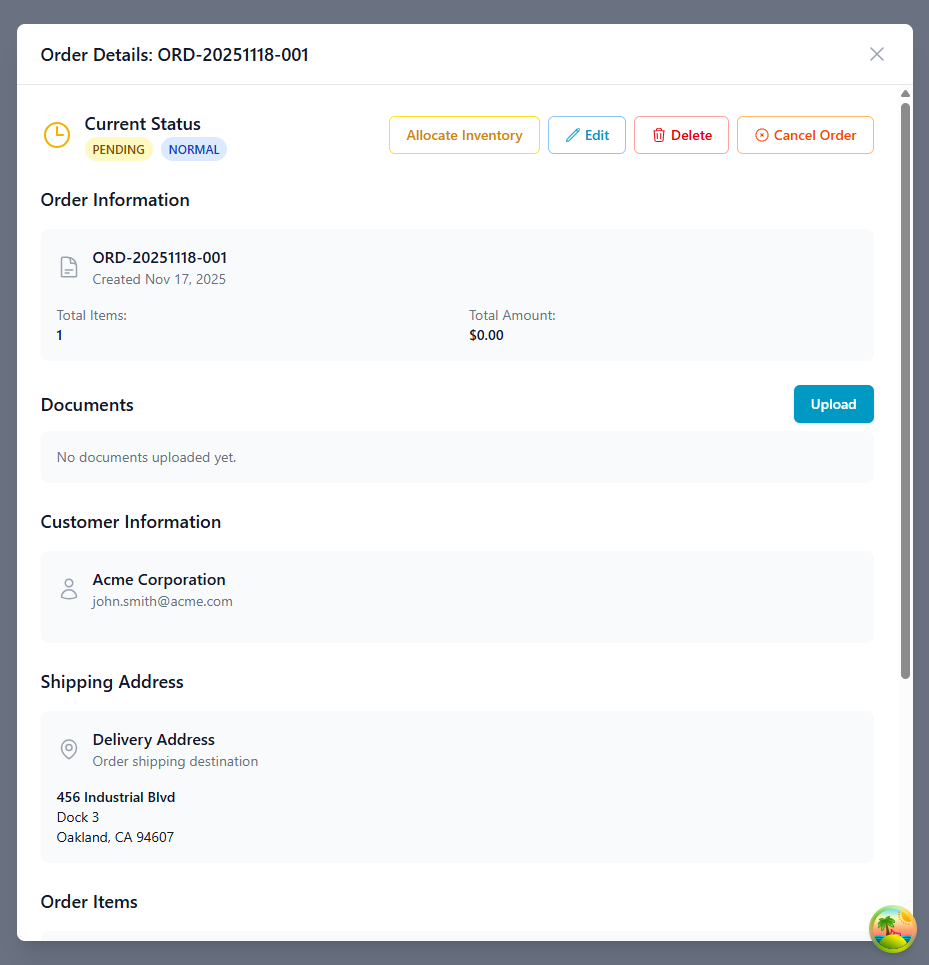
Click any row on the Orders page to open the order. The detail view is grouped into sections:
| Section | What you'll find |
|---|---|
| Current status | The status and priority badges, plus the buttons you can use right now — Allocate Inventory, Edit, Delete, Cancel Order |
| Order information | Order number, created date, number of products, and total value |
| Customer | Name, contact email, active status, tier, and available credit |
| Shipping address | Where it's going, the address label, delivery instructions, and a contact number |
| Order items | Per line: product, SKU, unit price, and the quantity ordered, allocated, and picked, with progress bars |
| Documents | Purchase orders, invoices, and packing slips attached to the order |
| System information | Created and last-updated timestamps, and the full change history |
Which buttons appear depends on the status. Edit is only available while the order is Pending.
Delete and Cancel are not the same
Cancel Order keeps the order and its history, and releases the reserved stock. Delete removes it permanently. Cancel unless you genuinely need the record gone.
When you can still cancel
Cancel Order is only available while the order is Pending or Allocated, and only before any pick list has been created for it. Once a pick list exists, cancel the pick list first — see Pick lists — and the order returns to Allocated, where you can cancel it.
Filling the order
Reserving the stock
-
Open a Pending order and choose Allocate Inventory.
The platform reserves stock using the strategy set for that warehouse — FIFO, FEFO, or LIFO.
-
Review what it reserved and adjust it if you need to.
With FEFO, the stock closest to its expiry date is reserved first, so perishable goods go out before they turn. If anything already expired gets reserved, you'll see a warning before you confirm.
The order moves to Allocated.
Choosing lots by hand
For lot-tracked products, the allocation window shows one card per lot with its lot number, expiry date, and available quantity. Pick the lots you want when a customer needs a particular batch.
Picking
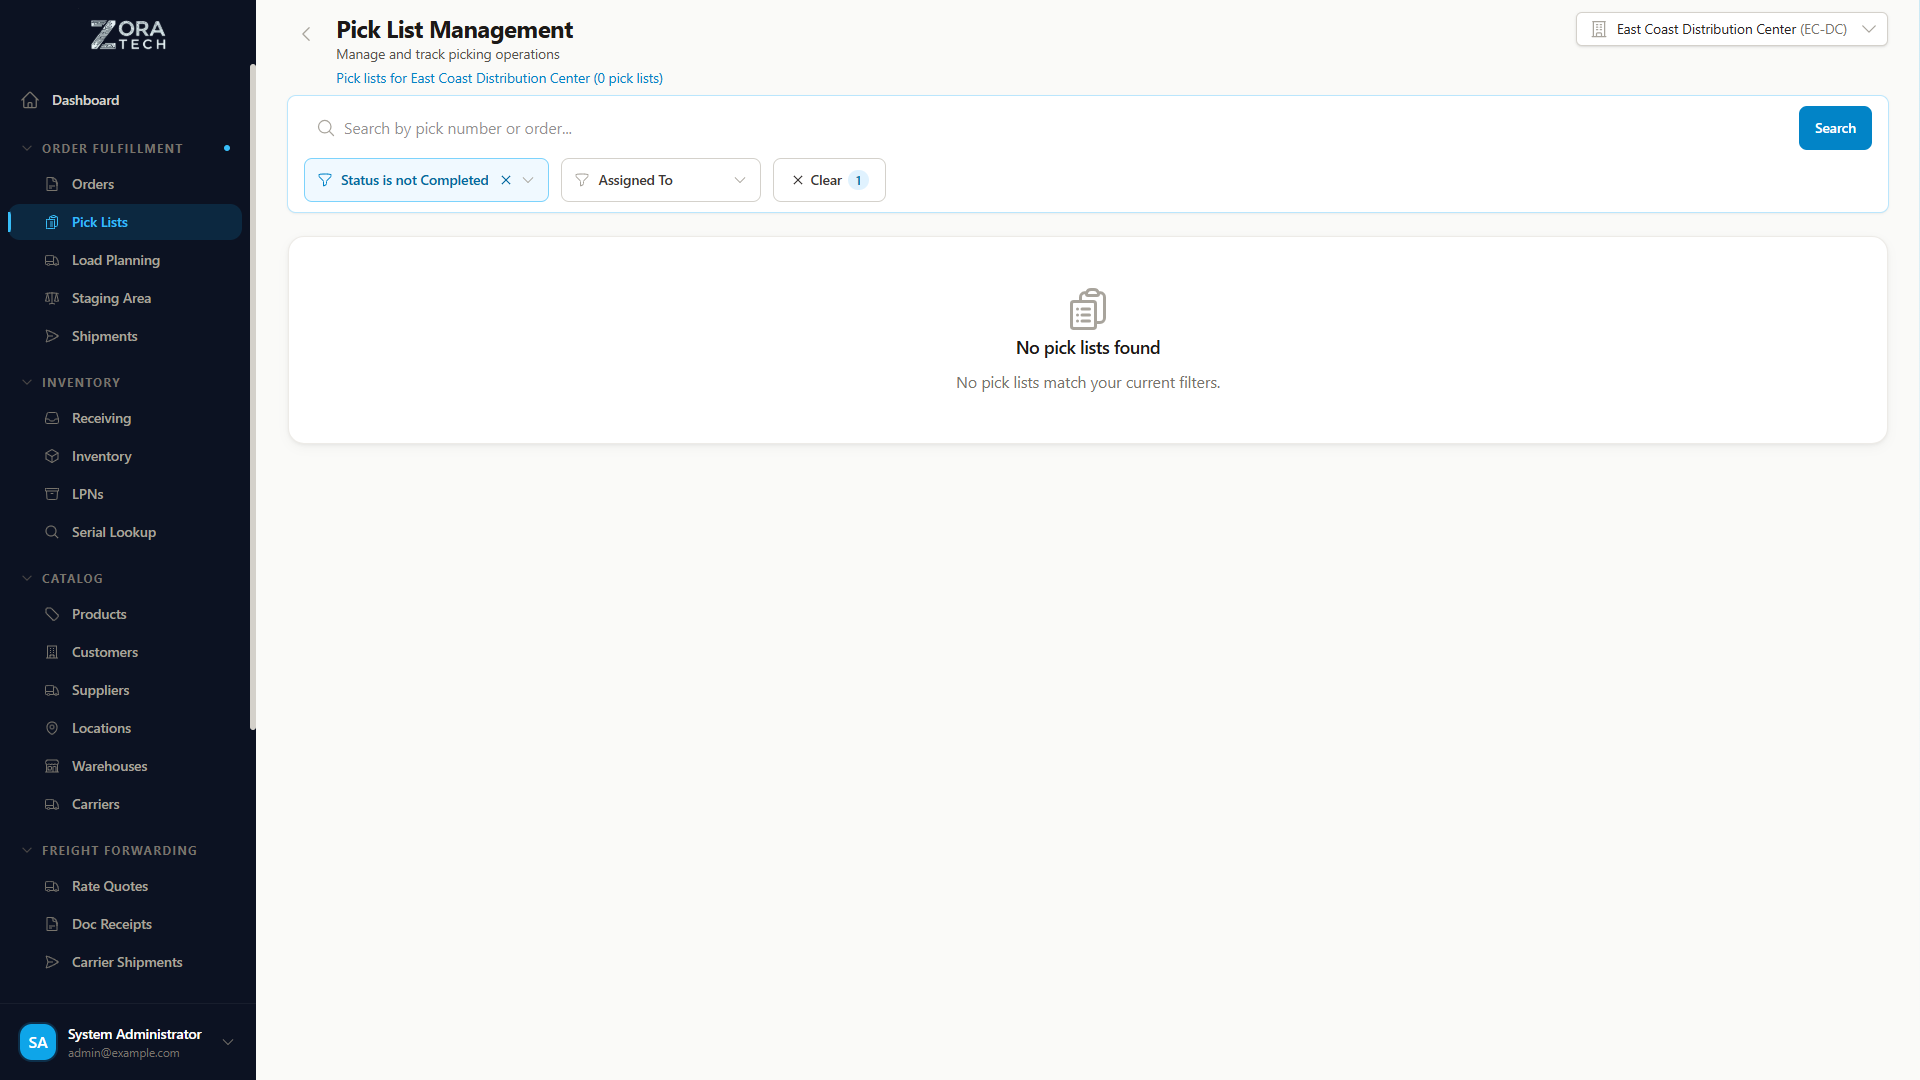
- Create a pick list from the allocated order and assign it to someone. The platform orders the stops by location so the picker walks a sensible route.
- The picker scans each product and confirms the quantity at each location. Progress updates as they go, and the platform records who picked what.
-
When everything is picked, confirm the pick list and move the stock to the staging area.
The order moves to Ready to pack.
Where an order is spread across several LPNs, the picking screen lists every LPN with the quantity to take from each.
Cancelling a pick list part-way through releases the reserved and partly-picked quantities back to available stock, and logs who cancelled it and when. The order goes back to a state where you can re-allocate it.
Check the shelf after cancelling a part-picked list
Items already picked are reversed back to the locations they came from. Count them to confirm the shelf matches the screen before you carry on.
Packing
- Collect the picked items from staging and scan them at the packing station.
- Choose the packaging and scan it so it's recorded against the order.
- Print the carrier label and attach it to the package.
-
Confirm the pack.
The order moves to Ready to ship.
Shipping
- Scan the packed order at the shipping station and check the carrier and service level.
- Choose the carrier and service level. The platform generates the tracking number.
- Build the end-of-day manifest covering everything going out, and send it to the carrier.
-
Mark the orders shipped.
The order moves to Shipped, the customer gets the tracking number, and stock levels come down.
Order statuses
An order carries one of these. You don't set them by hand — they change as you work.
Getting the order ready:
| Status | Means |
|---|---|
PENDING | Created, waiting for stock to be reserved. This is where a new order starts. |
ALLOCATED | Stock reserved, ready for a pick list |
PICKING | Pick list active, someone is walking the aisles |
PARTIALLY_PICKED | Some lines picked, some still outstanding |
READY_TO_PACK | Everything picked, waiting at the packing station |
PACKING | Being packed |
READY_TO_SHIP | Packed and labeled, waiting to go on a shipment |
Getting it out the door:
| Status | Means |
|---|---|
SHIPMENT_PLANNED | Added to a shipment |
MANIFEST | On a manifest, waiting for the carrier to collect |
DISPATCHED | Collected by the carrier |
IN_TRANSIT | On its way to the customer |
DELIVERED | Confirmed delivered |
And one that stops everything:
| Status | Means |
|---|---|
CANCELLED | Cancelled. Reserved stock goes back to available. |
SHIPPED is a legacy status
You may still see SHIPPED on older orders. It predates the SHIPMENT_PLANNED → MANIFEST → DISPATCHED → IN_TRANSIT sequence and is kept so historic orders still make sense. New orders move through the newer statuses instead.
Bigger jobs
Staging areas
Staging areas hold stock between steps — after picking and before packing, while partial picks are combined into a whole order, or while packed orders are sorted by carrier. See Staging areas.
Orders across several warehouses
An order belongs to one warehouse and can't be moved to another. If the stock is split across sites, raise an order in each warehouse that holds part of it.
Load planning
For LTL, truckload, and freight, load planning decides which LPNs go on which truck. It tracks weight and cube as you add LPNs, generates pick lists from a finished plan, routes LPNs through staging or straight to the shipment, and has you scan every LPN as it's loaded.
See the load planning guide.
Getting it right
When you create the order, confirm the customer's details and check the stock is actually there before you promise a date.
When you reserve stock, use FIFO for general goods — it's the default. Use FEFO for anything with an expiry date; set it per warehouse in Settings, and override it on a single allocation when one order needs different treatment.
When you pick, scan every product rather than picking by eye, double-check quantities on high-value items, confirm the location matches what the screen says, and report any discrepancy straight away instead of adjusting silently.
When you pack, use packaging that suits the product, check the package weight against what you expect, make sure the label is clean and readable, and include the packing slip and any inserts.
Troubleshooting
| Problem | What to do |
|---|---|
| "Warehouse required" when creating an order | Choose a warehouse from the dropdown before submitting. |
| Customer doesn't come up in search | Check the spelling. If they're genuinely not there, create the customer record first. |
| Allocation fails | Check the stock is in this warehouse, and that the product is active with stock available. |
| Order stuck in Picking | Open the pick list and see what's outstanding. Complete or cancel the remaining picks. |
| Can't generate a shipping label | Check the shipping address is complete, and that the carrier's credentials are set up. Refresh and try again. |
| Order items missing from the detail view | Open the order in edit mode and check the line items. If a product was deleted, contact your administrator. |
Still stuck? Contact your system administrator or warehouse manager with the order number and the exact error message.
Things worth knowing
- An order belongs to one warehouse. Stock is only ever reserved from that warehouse, and order numbers run in sequence per warehouse.
- Creating an order needs standard user permissions. Allocating stock needs inventory permissions, and cancelling may need a supervisor.
- Orders update live across every session, so two people never see different numbers. Stock levels drop the moment you allocate.
- Pick lists for large orders are generated in the background and may take a moment to appear.