Warehouse Management User Guide
Table of Contents
- Overview
- Accessing Warehouse Management
- Creating a New Warehouse
- Viewing Warehouse Details
- Managing Existing Warehouses
- Best Practices
- Troubleshooting
Overview
The Warehouse Management system in Zora Tech's Logistics Platform allows you to create, configure, and manage multiple warehouse facilities. Each warehouse serves as a distinct location for inventory management, receiving, and shipping operations.
Key Features
- Multi-warehouse support: Manage unlimited warehouse facilities
- Comprehensive address management: Full address validation and formatting
- Contact information tracking: Store phone and email contacts for each facility
- Status management: Active/inactive warehouse controls
- Integration ready: Seamless integration with inventory and order management
Accessing Warehouse Management
Step 1: Login to the Platform
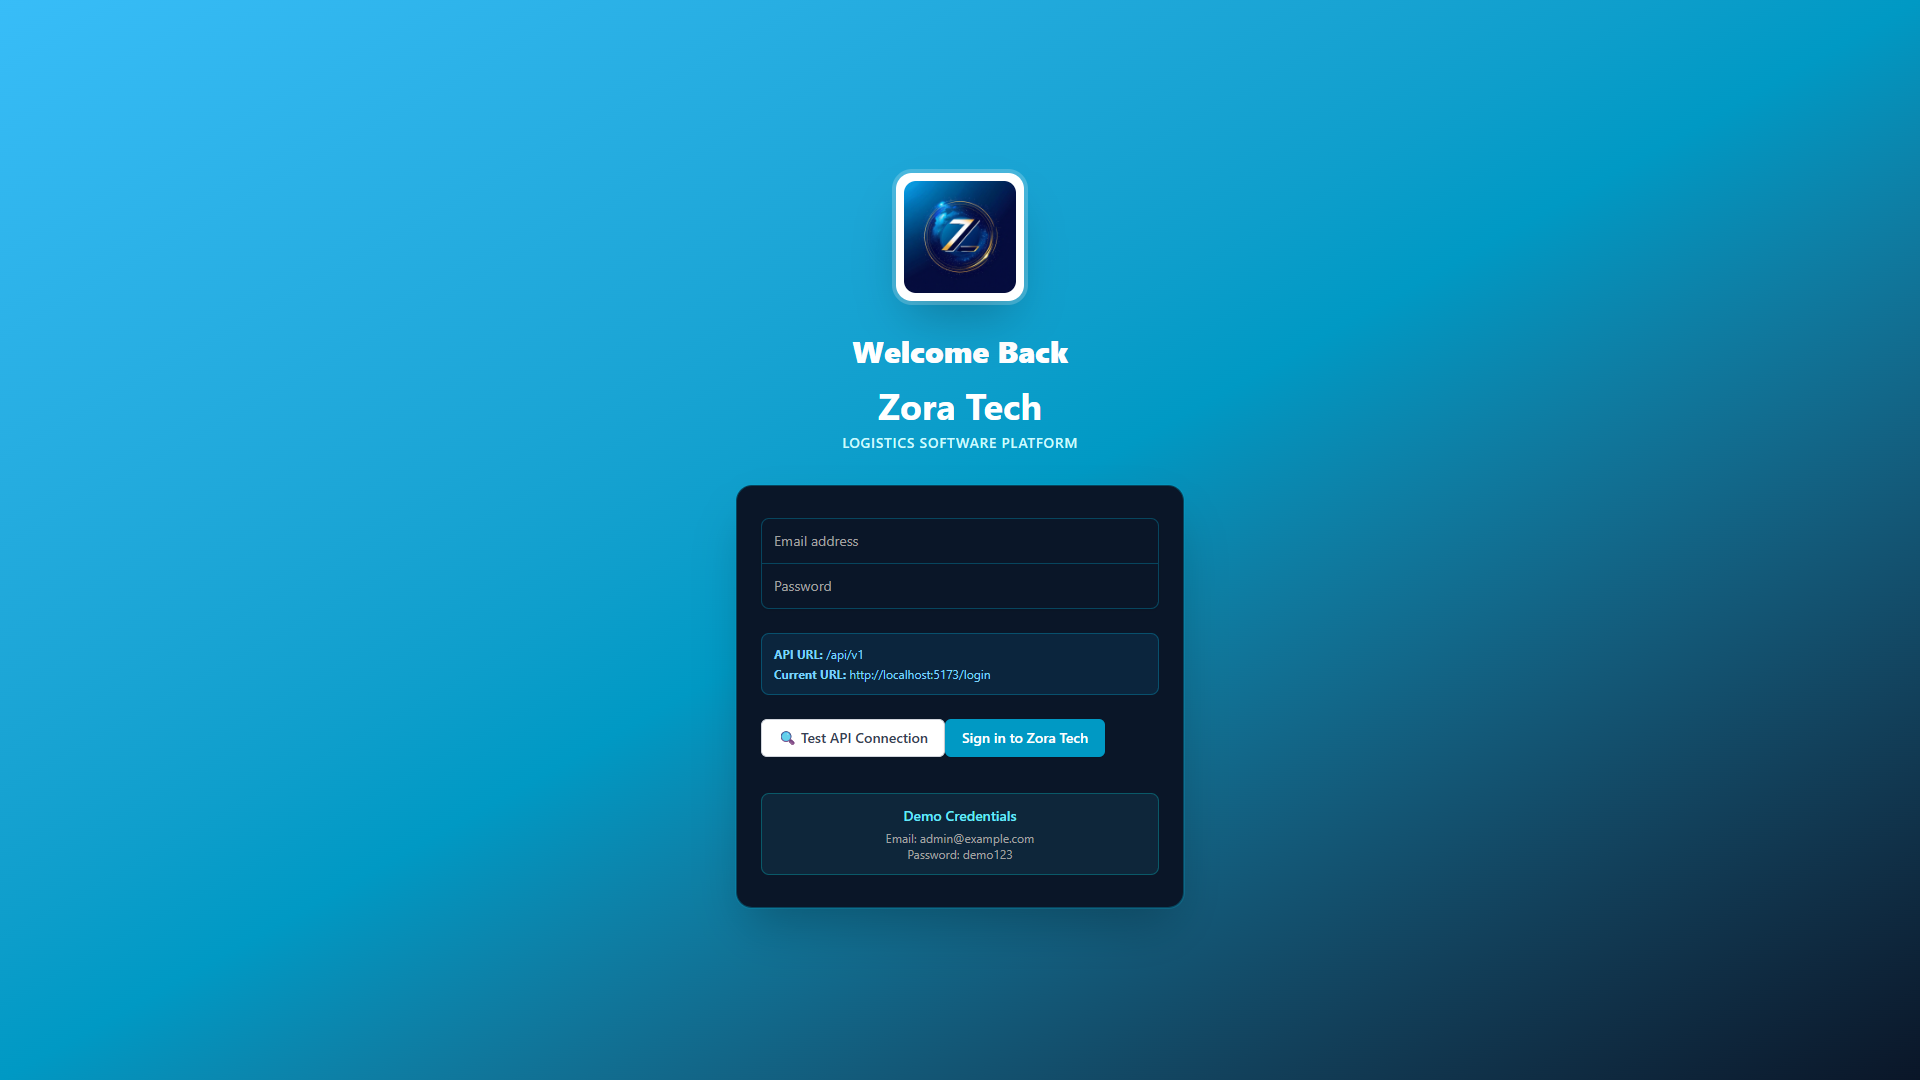
- Navigate to your Zora Tech Logistics Platform URL
- Enter your credentials:
- Email: Your registered email address
- Password: Your secure password
- Click "Sign in to Zora Tech"
Step 2: Navigate to Dashboard
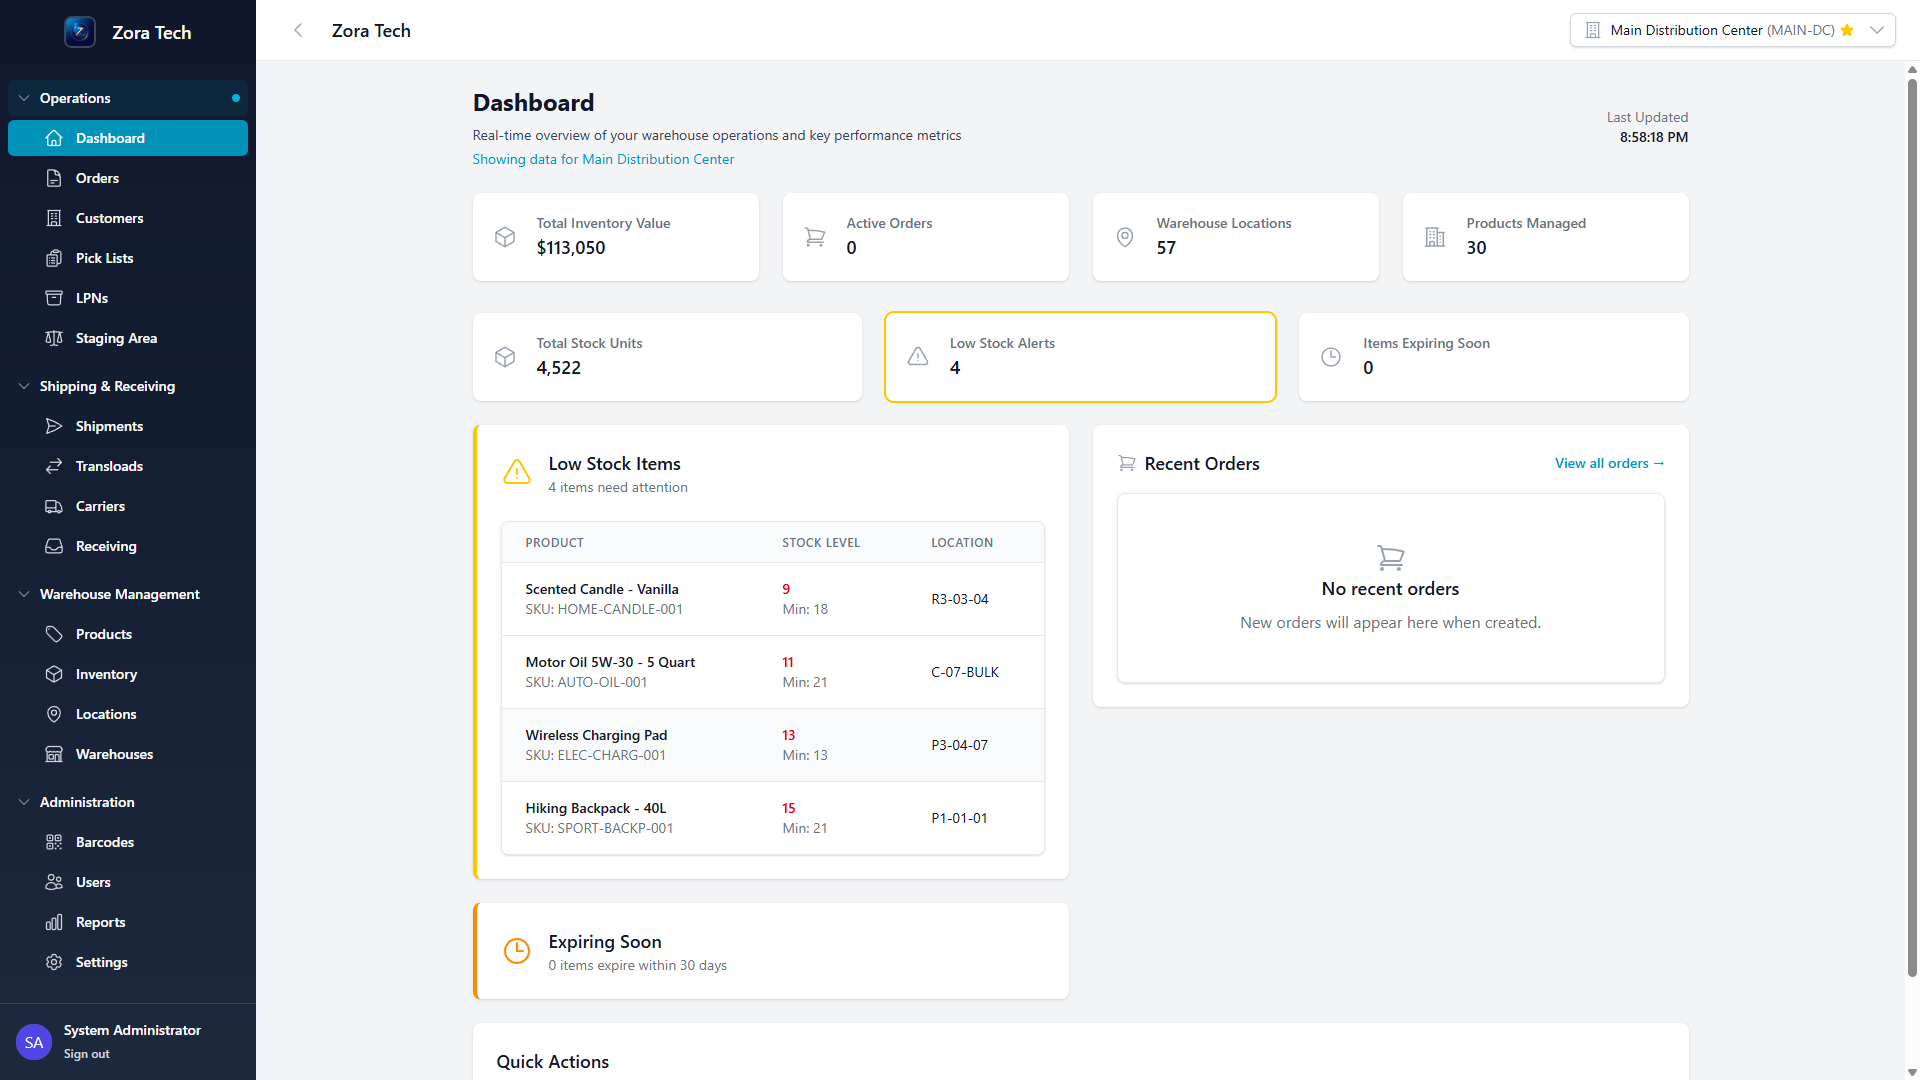
After successful login, you'll see the main dashboard with: - Real-time metrics displaying inventory value, active orders, and warehouse statistics - Navigation sidebar with organized menu sections - Warehouse selector at the top showing your current warehouse context - Quick action buttons for common tasks
Step 3: Access Warehouse Management
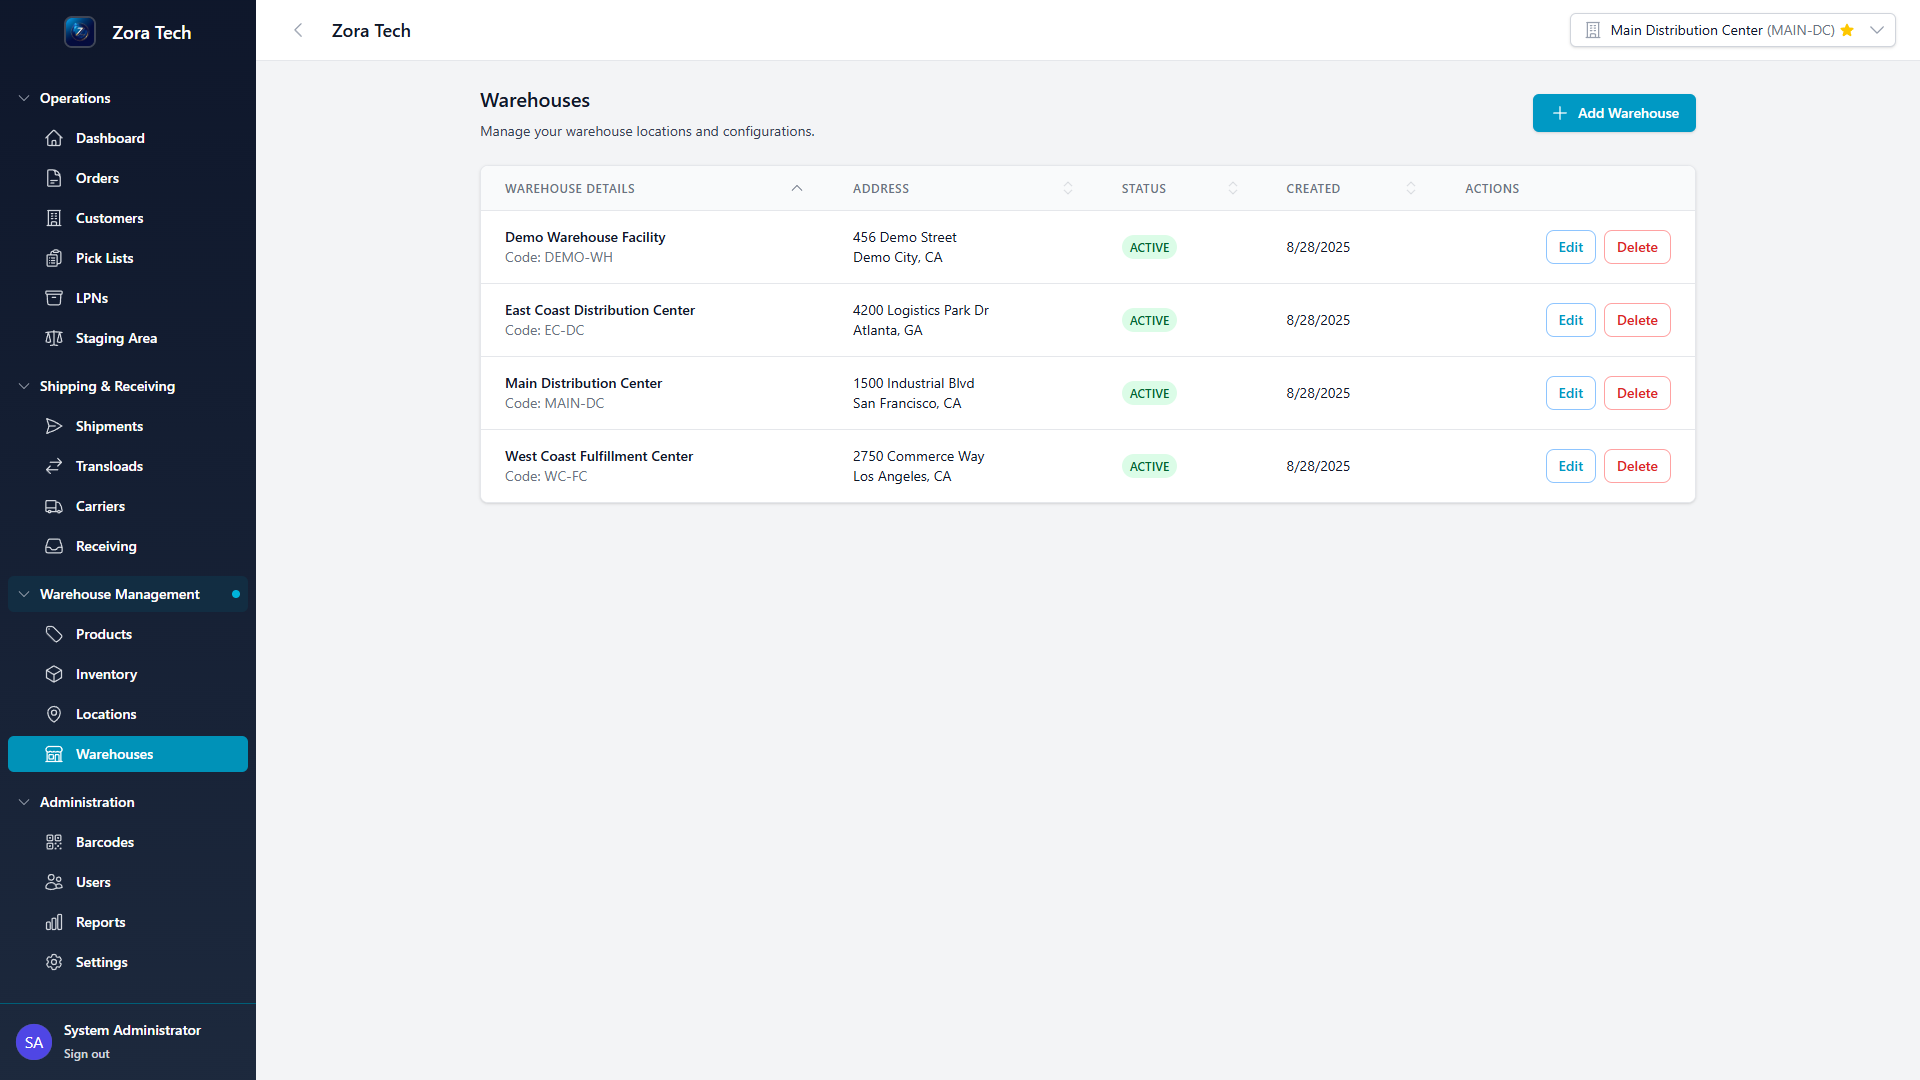
- In the left sidebar, locate the "Warehouse Management" section
- Click on "Warehouses"
- You'll see the warehouse management page displaying:
- List of existing warehouses with key details
- "Add Warehouse" button for creating new facilities
- Sortable columns for warehouse details, address, status, and creation date
Creating a New Warehouse
Step 1: Initiate Warehouse Creation
From the Warehouses page, click the "Add Warehouse" button to open the creation form.
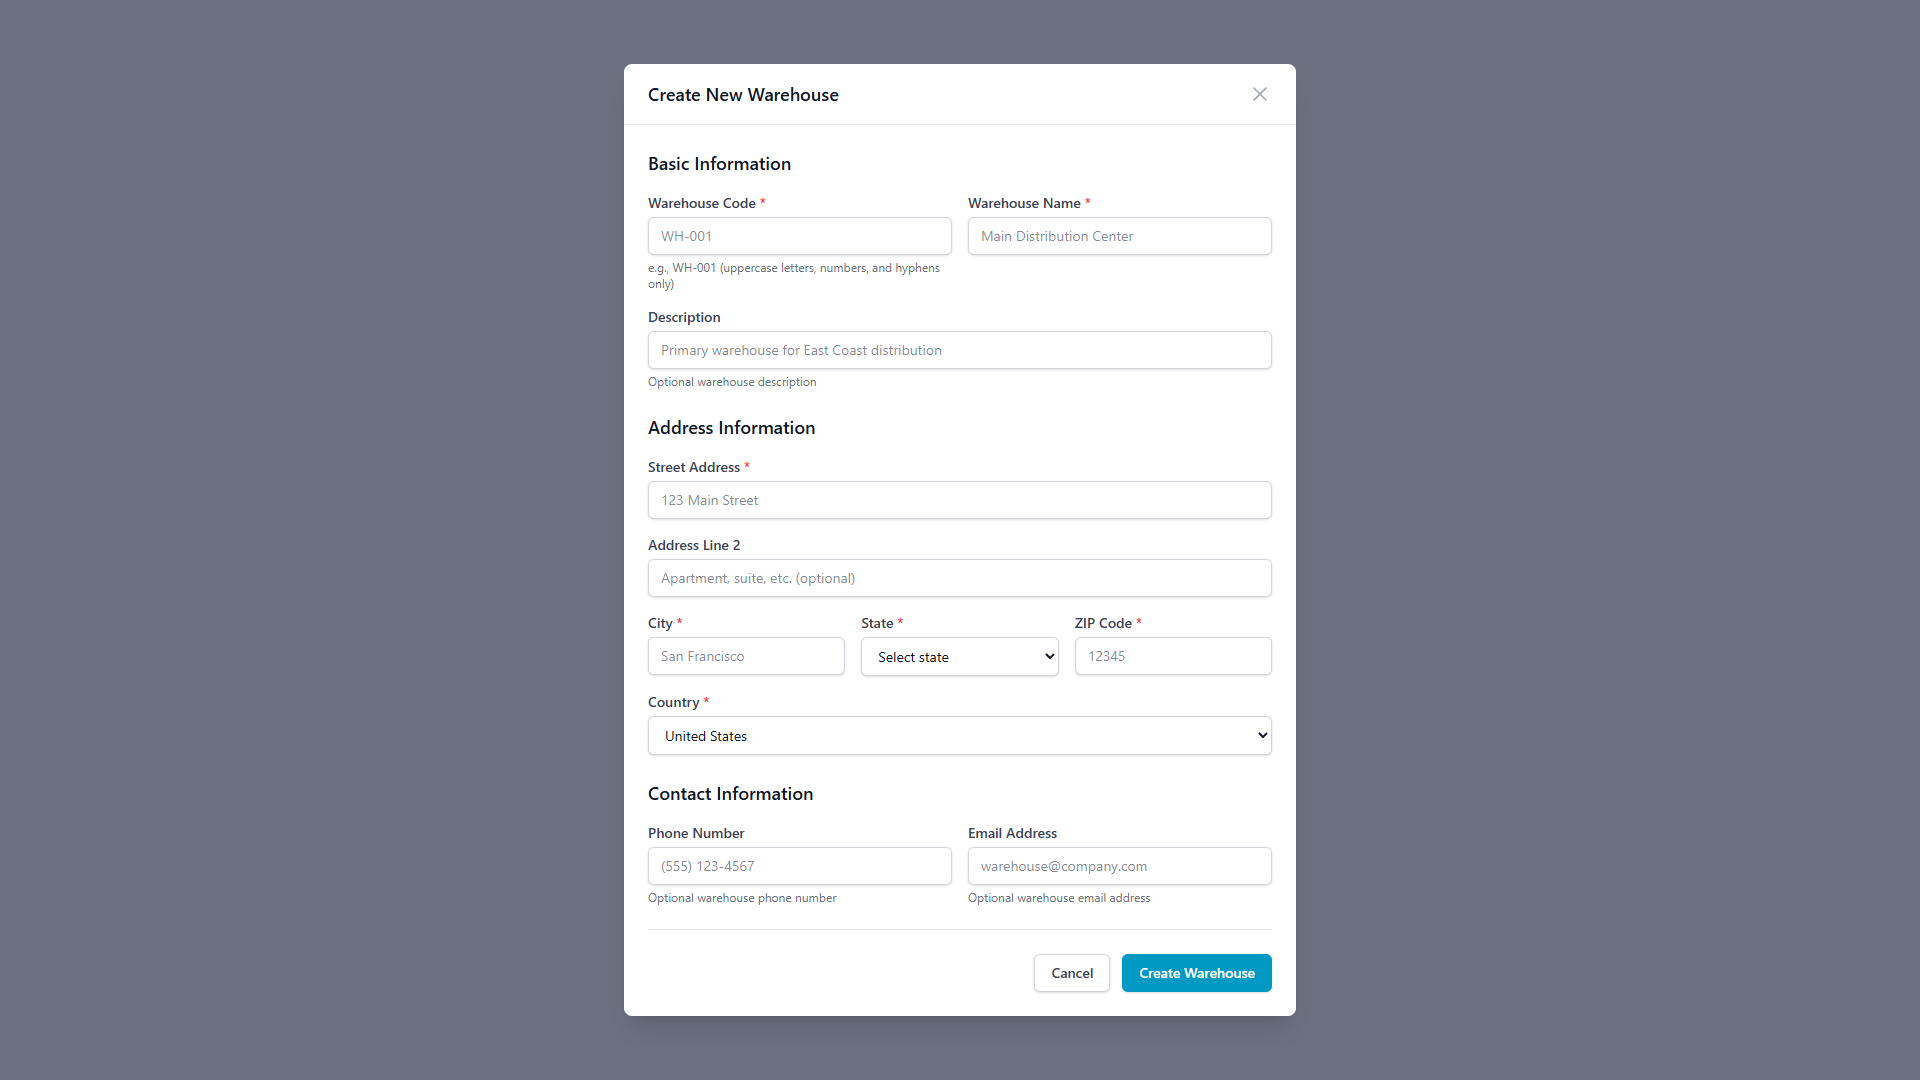
Step 2: Complete Basic Information
Required Fields
- Warehouse Code:
- Unique identifier (e.g., "DEMO-WH")
- Must contain only uppercase letters, numbers, and hyphens
-
Used for system references and reporting
-
Warehouse Name:
- Descriptive name (e.g., "Demo Warehouse Facility")
- Used in user interfaces and reports
Optional Fields
- Description:
- Additional context about the warehouse purpose
- Helpful for team members and documentation
Step 3: Enter Address Information
Required Address Fields
- Street Address: Primary address line
- City: Warehouse city location
- State: Select from dropdown menu
- ZIP Code: Postal code for the location
- Country: Default is United States
Optional Address Fields
- Address Line 2: Suite, unit, or additional address details
Step 4: Add Contact Information (Optional)
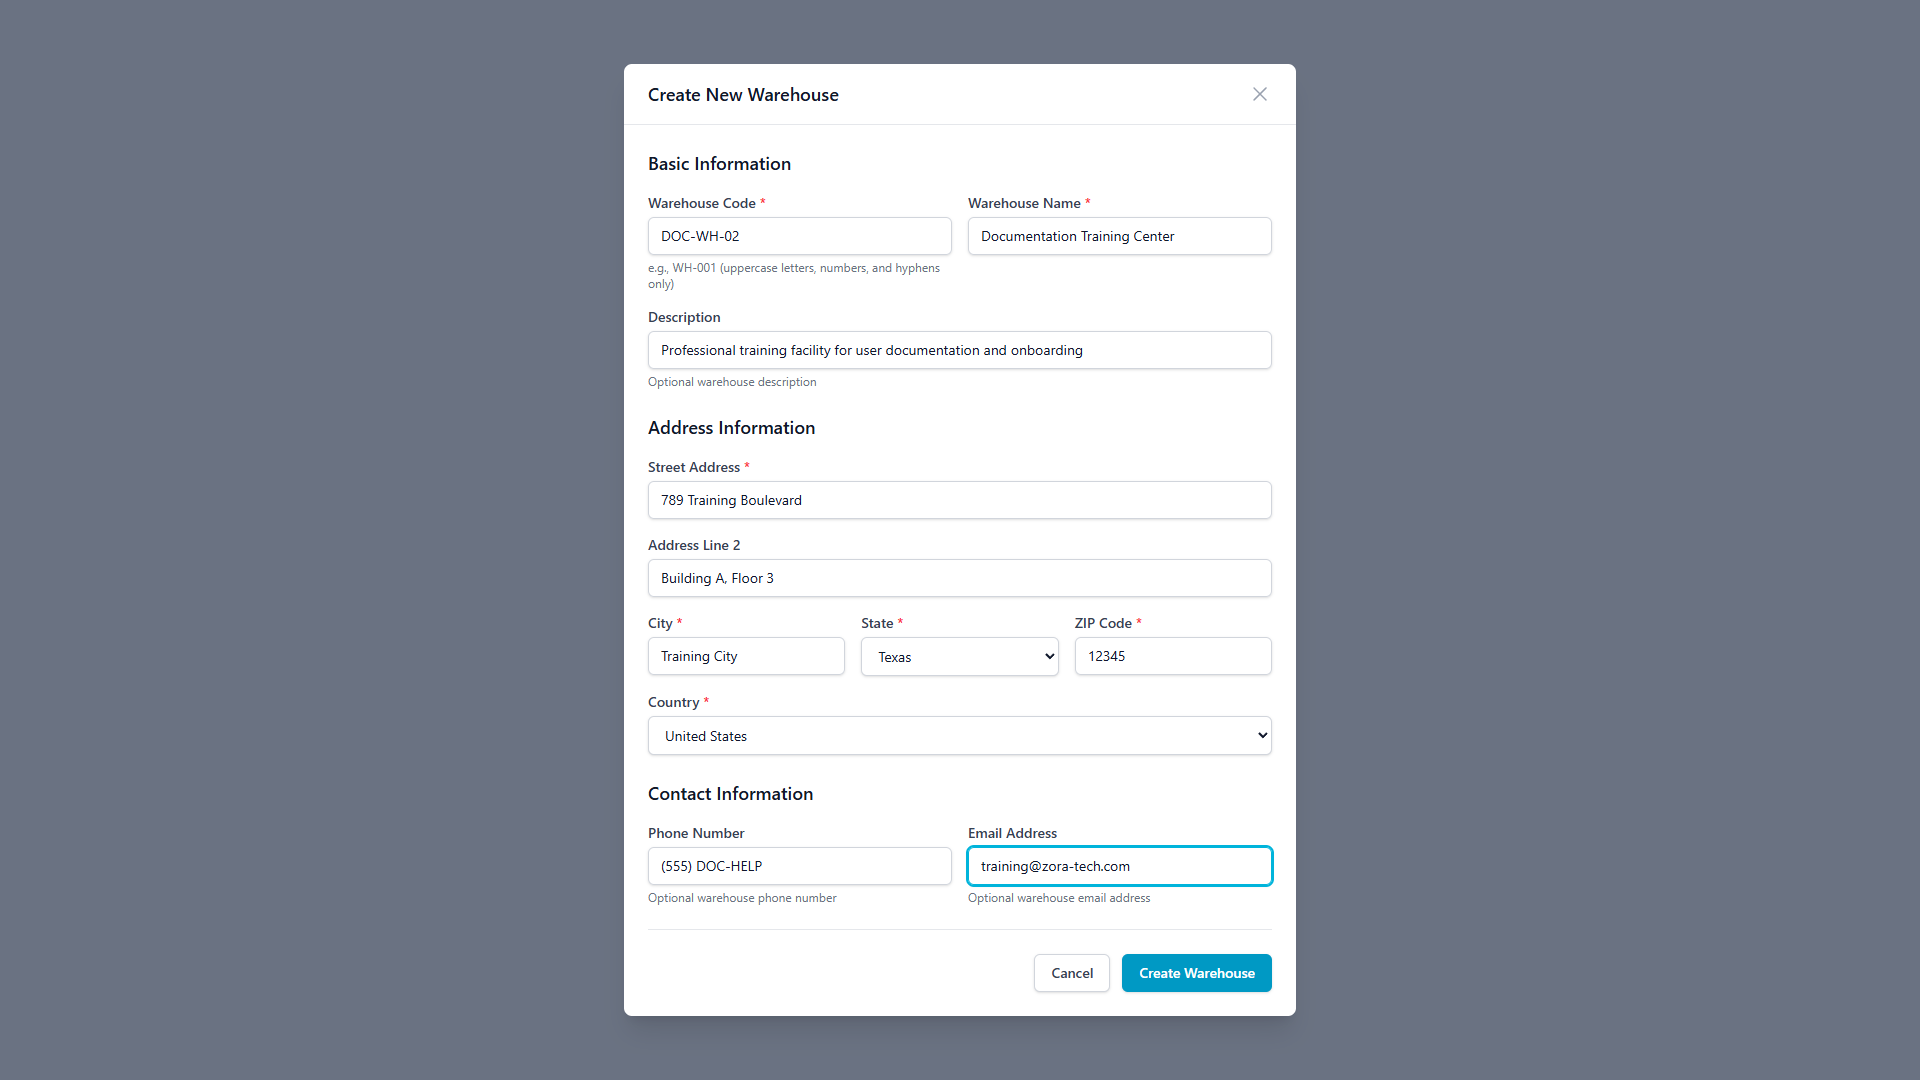
- Phone Number: Direct warehouse phone line
- Email Address: Warehouse-specific email contact
Step 5: Submit and Verify
- Review all entered information for accuracy
- Click "Create Warehouse" to submit the form
- The system will validate all required fields
- Upon success, you'll return to the warehouse list

Step 6: Confirmation
After successful creation, you'll see: - Your new warehouse appears at the top of the list - ACTIVE status automatically assigned - Current date/time recorded as creation timestamp - Edit and Delete actions available
Viewing Warehouse Details
Accessing Warehouse Details
To view comprehensive information about any warehouse:
- Navigate to the Warehouses page from the Warehouse Management section
- Click on any warehouse row in the table
- The warehouse details modal will open, displaying complete warehouse information
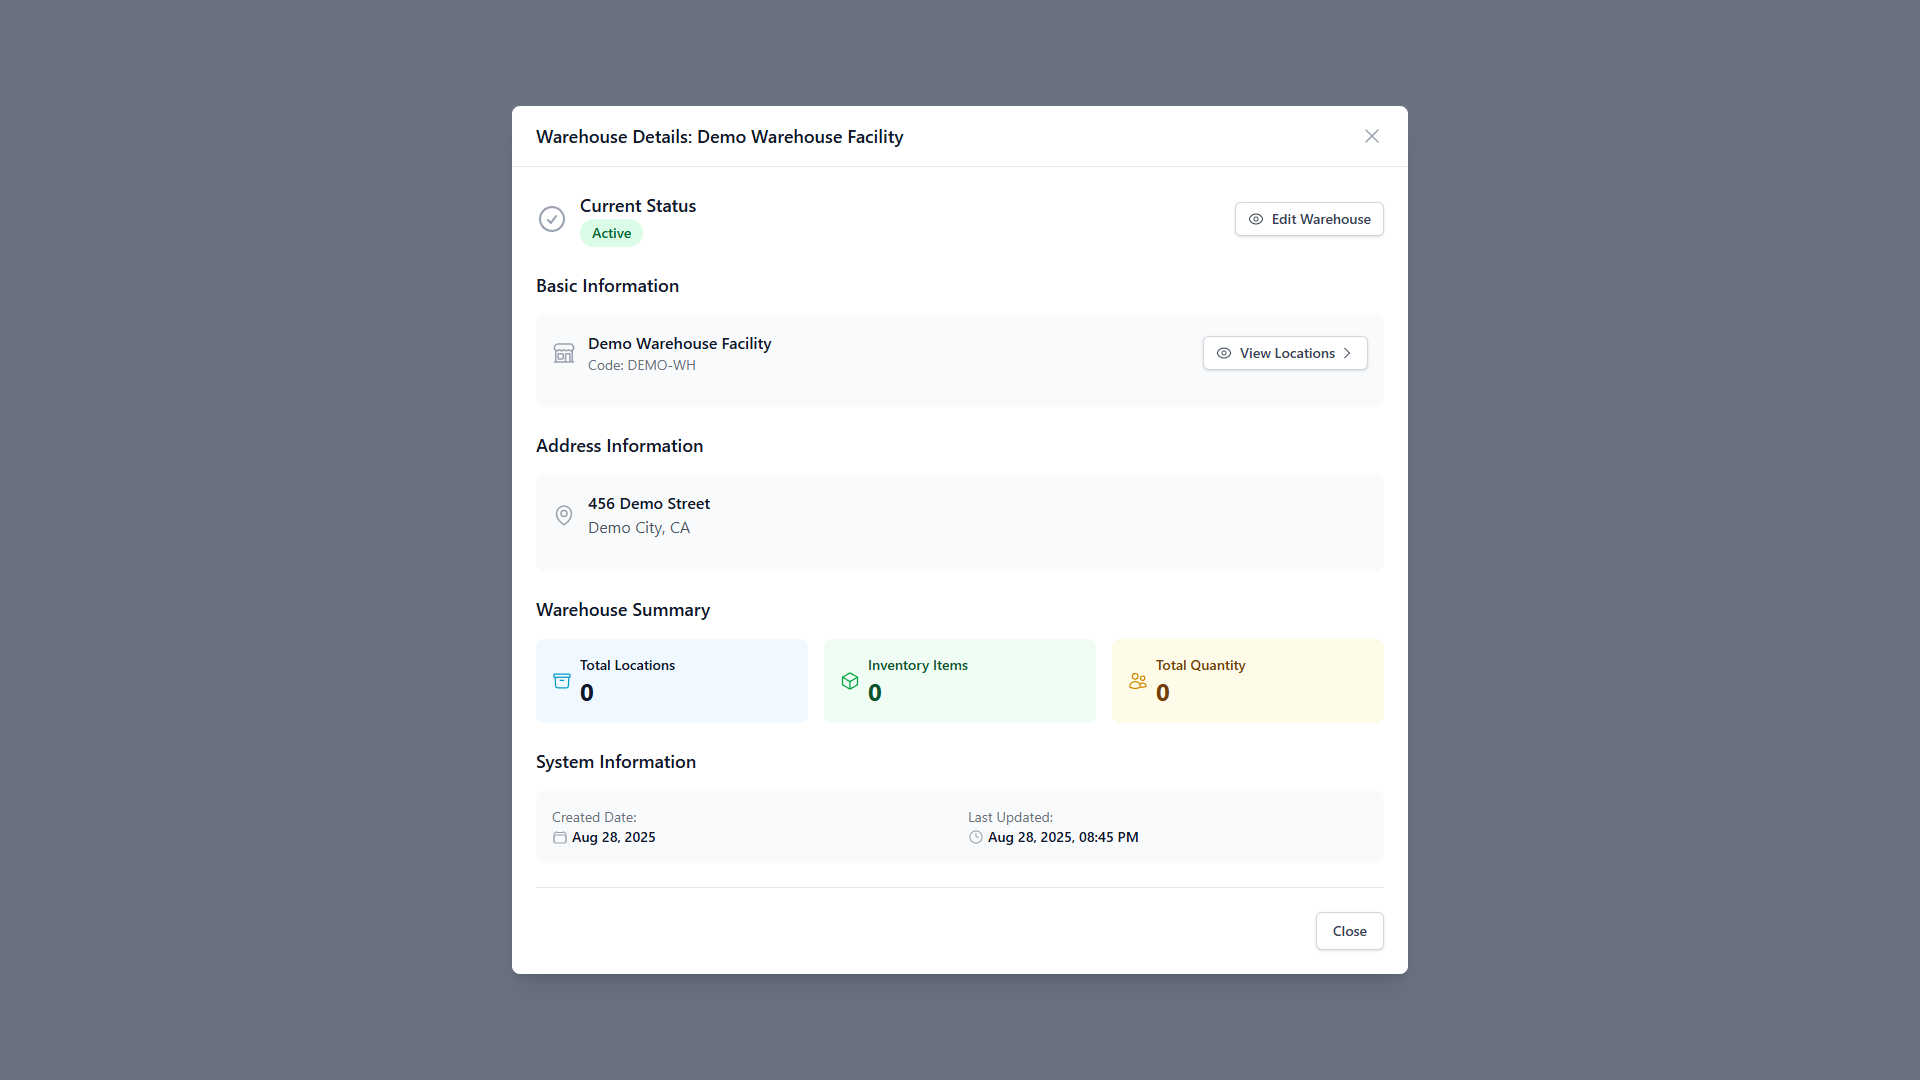
Warehouse Details Information
The warehouse details modal provides comprehensive information organized into several key sections:
Current Status Section
- Status Indicator: Shows whether the warehouse is ACTIVE or INACTIVE
- Edit Warehouse Button: Direct access to modify warehouse settings
- Visual Status Icon: Color-coded status indication for quick identification
Basic Information Section
- Warehouse Name: Full descriptive name of the facility
- Warehouse Code: Unique identifier used throughout the system
- View Locations Button: Direct navigation to warehouse location management
Address Information Section
- Complete Address: Full street address and location details
- Geographic Information: City, state, and postal code
- Visual Address Icon: Easy identification of address section
Warehouse Summary Section
Real-time operational metrics: - Total Locations: Number of configured storage locations within the warehouse - Inventory Items: Count of unique products stored in this warehouse
- Total Quantity: Sum of all inventory quantities across all products
System Information Section
Administrative and audit information: - Created Date: When the warehouse was first added to the system - Last Updated: Most recent modification timestamp - Audit Trail: Complete change history for compliance and tracking
Key Features of Warehouse Details
Real-Time Data
- Live Metrics: Inventory counts and location data update in real-time
- Current Status: Reflects the most up-to-date warehouse operational state
- Dynamic Calculations: Totals automatically recalculate based on current inventory
Direct Actions
- Edit Access: Single-click access to warehouse modification
- Location Management: Direct navigation to location configuration
- Status Updates: Quick access to enable/disable warehouse operations
Information Architecture
- Organized Layout: Information grouped logically for easy scanning
- Visual Hierarchy: Important information prominently displayed
- Responsive Design: Optimized for both desktop and mobile viewing
Using Warehouse Details for Operations
Daily Operations
- Status Verification: Confirm warehouse is active before operations
- Capacity Planning: Review location and inventory totals for planning
- Quick Reference: Access address and contact information as needed
Administrative Tasks
- Audit Reviews: Check creation and modification dates
- Status Management: Enable or disable warehouses as needed
- Data Validation: Verify address and configuration information
Integration Points
- Inventory Context: Understand which inventory belongs to which warehouse
- Location Management: Navigate directly to configure warehouse locations
- Operational Planning: Use summary metrics for capacity and workflow planning
Managing Existing Warehouses
Editing Warehouses
- Click the "Edit" button next to any warehouse
- Modify information in the same form used for creation
- Save changes to update the warehouse record
Warehouse Status Management
- ACTIVE: Warehouse is operational and available for use
- INACTIVE: Warehouse is disabled but data is preserved
Deleting Warehouses
⚠️ Caution: Deleting a warehouse is permanent and cannot be undone. 1. Click the "Delete" button 2. Confirm the deletion in the popup dialog 3. Warehouse and all associated data will be removed
Best Practices
Warehouse Code Naming
- Use consistent prefixes (e.g., "WH-", "DC-", "FC-")
- Include location indicators (e.g., "NYC-WH-01", "LA-DC-MAIN")
- Keep codes short but descriptive
Address Management
- Always include complete, accurate addresses
- Use standardized address formats
- Verify ZIP codes match city/state combinations
Contact Information
- Maintain current phone numbers and email addresses
- Use warehouse-specific contacts when possible
- Update contacts promptly when personnel changes occur
Documentation
- Use descriptive warehouse names
- Include relevant details in the description field
- Document special handling requirements or restrictions
Troubleshooting
Common Issues
Issue: Warehouse code already exists - Solution: Choose a unique warehouse code - Prevention: Check existing codes before creating new warehouses
Issue: Required fields missing - Solution: Complete all fields marked with red asterisks () - **Check*: Warehouse Code, Name, Street Address, City, State, ZIP Code, Country
Issue: Invalid address format - Solution: Use standard address formatting - Verify: ZIP code matches selected state
Issue: Form submission fails - Solution: Check network connection and refresh page - Retry: Complete form again if data was lost
Getting Help
If you encounter issues not covered in this guide: 1. Contact your system administrator 2. Check system status and network connectivity 3. Clear browser cache and cookies 4. Try accessing from a different browser or device
Integration Notes
Warehouse Context
- Warehouses provide context for all inventory operations
- Users can switch between warehouses using the warehouse selector
- All inventory transactions are warehouse-specific
Permissions
- Warehouse creation requires administrative privileges
- Individual warehouse access can be controlled per user
- Contact your administrator for permission changes
Data Flow
- Warehouse creation immediately enables inventory operations
- Locations, products, and orders become available within the new warehouse
- Historical data remains warehouse-specific
Last Updated: August 2025
Version: 1.0
For additional assistance or feature requests, please contact your system administrator or refer to the complete Zora Tech Logistics Platform documentation.